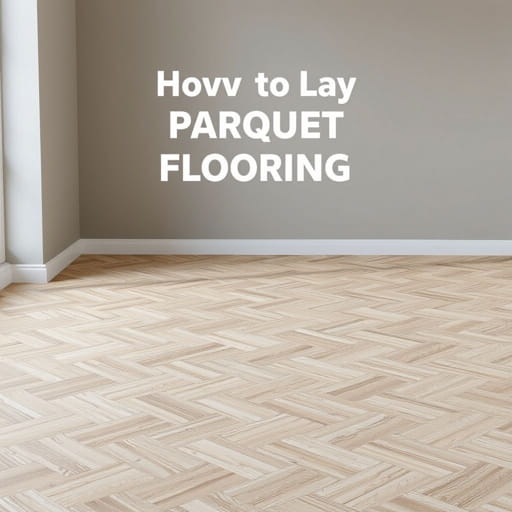
How to Lay Parquet Flooring A Step-by-Step GuideParquet flooring is a beautiful and timeless option for any home. Its intricate patterns and elegant design can enhance the aesthetics of your living space. Whether you choose a classic herringbone pattern or a more modern geometric style, installing parquet flooring can be a rewarding DIY project if done properly. In this guide, we will take you through the steps to successfully lay parquet flooring, from preparation to installation.
Why Choose Parquet Flooring?
Before diving into the process, it’s important to understand why parquet flooring is a popular choice for many homeowners. Here are a few reasons
-
Aesthetic Appeal Parquet flooring adds a unique charm to any room. The patterns and textures it offers can give your space a sophisticated, luxurious look.
-
Durability Parquet is made from hardwood, making it a durable and long-lasting flooring option.
-
Easy Maintenance When well-maintained, parquet floors can last for decades, and their sleek surface is relatively easy to clean.
-
Increased Property Value Parquet floors are often seen as a high-end feature in a home, which can add value to your property.
Tools and Materials You’ll Need
To lay parquet flooring properly, you will need the following tools and materials
-
Parquet Tiles or Planks Choose from different types of wood (oak, maple, walnut, etc.) and styles (herringbone, chevron, basket weave).
-
Underlayment To ensure a stable and level foundation for your parquet, you may need an underlayment, particularly if installing over concrete.
-
Adhesive Depending on the type of parquet flooring, you may need a specific type of adhesive, such as wood glue or a strong floor adhesive.
-
Measuring Tape For accurate measurements and cutting.
-
Utility Knife For cutting underlayment and any necessary adjustments to the parquet tiles.
-
Flooring Roller To press down the tiles and ensure proper adhesion.
-
Spacers To maintain consistent gaps between the tiles and edges of the room.
-
Rubber Mallet To gently tap tiles into place without damaging the surface.
-
Saw (if necessary) To cut parquet tiles to fit edges and corners.
-
Level To check that the floor is perfectly even.
-
Trowel For spreading adhesive evenly on the floor.
Step-by-Step Instructions for Laying Parquet Flooring
Step 1 Prepare the Subfloor
The success of your parquet installation starts with a clean, level subfloor. If the surface is not smooth, it can lead to uneven installation or damage to the tiles over time. Here’s what you should do
-
Clean the Subfloor Sweep and vacuum the area thoroughly to remove any dust or debris.
-
Check for Moisture Especially with concrete subfloors, it’s important to check for moisture, as this can damage the parquet. Use a moisture meter to ensure the area is dry.
-
Level the Surface If the subfloor is uneven, you can use a self-leveling compound to smooth it out. Allow it to dry completely before proceeding.
-
Lay Underlayment If needed, roll out the underlayment across the subfloor. This will provide extra support and can help with soundproofing.
Step 2 Plan the Layout
Before you start laying the parquet tiles, it’s important to plan the layout to ensure a seamless and aesthetically pleasing design. Follow these steps
-
Find the Center Use a measuring tape and chalk line to find the center of the room. This will serve as your reference point for the layout.
-
Dry Lay the Tiles Place the tiles loosely on the floor in the pattern you want to install. This allows you to visualize how the tiles will fit and make any necessary adjustments before gluing them down.
-
Check Alignment Make sure the tiles align properly along the walls and in the center of the room. If the pattern needs to be adjusted to avoid awkward cuts along the edges, now is the time to make those changes.
Step 3 Apply Adhesive
Once you are satisfied with the layout, it’s time to start applying adhesive to the subfloor. Here’s how to do it correctly
-
Choose the Right Adhesive Make sure to use the adhesive recommended by the manufacturer for your specific parquet type. Most wood adhesives work well for parquet installation.
-
Spread the Adhesive Using a notched trowel, spread a thin, even layer of adhesive over the subfloor in a small section of the room. Start at the center or one corner of the room and work in small sections to avoid the adhesive drying before you can lay the tiles.
-
Work in Small Sections It’s best to apply adhesive to a small area at a time, as it can dry quickly. This allows you to work efficiently and ensures the adhesive doesn’t set before the tiles are in place.
Step 4 Lay the Parquet Tiles
Now that the adhesive is ready, it’s time to start laying the tiles. Here’s how to do it
-
Place the Tiles Start from the center of the room (or your designated starting point) and place the first tile in position. Press it down firmly to ensure a good bond with the adhesive.
-
Continue Laying Tiles Work your way out from the center, laying the tiles in the chosen pattern. If using interlocking parquet, make sure each tile clicks into place securely. For glue-down parquet, ensure each tile is aligned properly and sits flat.
-
Use Spacers Place spacers between the tiles to maintain even gaps. This ensures that the expansion and contraction of the wood will not cause problems later on.
-
Tap Tiles into Place Use a rubber mallet to gently tap each tile into place, ensuring that it sits flush with the adjacent tiles.
Step 5 Cut Tiles to Fit
Once you reach the edges of the room, you will likely need to cut some tiles to fit. Here’s how to do it
-
Measure the Space Measure the gap between the last full tile and the wall to determine the size of the cut tile.
-
Cut the Tile Use a saw to cut the parquet tile to the appropriate size. If you’re cutting hardwood tiles, make sure to use a fine-toothed blade to avoid damaging the wood.
-
Fit the Cut Tiles Place the cut tiles into the gap and press them down firmly to adhere to the adhesive.
Step 6 Let the Adhesive Dry
Once all the tiles are in place, allow the adhesive to dry completely. This may take anywhere from 24 to 48 hours, depending on the manufacturer’s recommendations.
Step 7 Finish the Edges
After the adhesive has dried, remove the spacers and fill in any remaining gaps along the edges with quarter-round or molding. This will provide a clean finish and help secure the tiles in place.
Laying parquet flooring is a satisfying and relatively simple project that can drastically enhance the appearance of any room. By following these steps and using the right materials, you can achieve a professional-looking installation that will last for years. Remember to take your time during the planning and installation phases to ensure the best results. With careful preparation and patience, your new parquet floor will become a beautiful and durable addition to your home.