Cooking an uncooked gammon joint in a Ninja Foodi is an excellent way to create a flavorful and tender centerpiece meal without the need for multiple pots or a long oven roast. The Ninja Foodi combines pressure cooking and air crisping, allowing the gammon to stay juicy on the inside while achieving a beautifully browned exterior. Whether you’re preparing gammon for a Sunday roast, Christmas dinner, or meal prep, this method is not only efficient but also results in delicious and consistent outcomes every time.
Why Use a Ninja Foodi for Gammon?
The Ninja Foodi offers the advantage of combining several cooking functions into one appliance, particularly pressure cooking and air frying. This is ideal for a gammon joint, which needs to be thoroughly cooked while maintaining its natural moisture. The pressure cooker reduces cooking time dramatically compared to stovetop or oven methods, while the air crisp feature adds texture and color to the outer layer of the meat.
Benefits of cooking gammon in a Ninja Foodi:
- Faster cooking time compared to traditional roasting
- Lock-in flavor with pressure cooking
- Air crisp finish gives a roasted texture without drying the meat
- Less mess and fewer dishes to clean
- Perfect for both everyday meals and special occasions
Preparing the Uncooked Gammon Joint
Before you start cooking, it’s important to prepare your uncooked gammon joint properly. Most supermarket-bought joints are cured and may be slightly salty. Some people prefer to soak the gammon in cold water for a few hours or overnight to remove excess salt. If you choose to skip this step, just be cautious with added seasoning.
Ingredients:
- 1.2-1.5 kg uncooked gammon joint (smoked or unsmoked)
- 1 onion, peeled and halved
- 2 cloves of garlic, crushed
- 2 bay leaves
- 6-8 peppercorns
- 500 ml water or low-sodium chicken stock
Optional glaze ingredients (for air crisping):
- 2 tablespoons honey or brown sugar
- 1 tablespoon mustard (Dijon or English)
- 1 tablespoon apple cider vinegar or orange juice
Step-by-Step Instructions
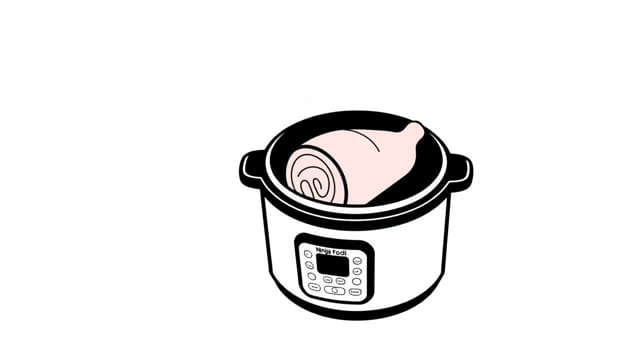
1. Place the Gammon in the Cooking Pot
Insert the pressure cooking pot into your Ninja Foodi. Place the gammon joint inside, fat-side up. Add the halved onion, garlic, bay leaves, peppercorns, and water or stock. The liquid should come up halfway or a little more up the side of the gammon. This will help in evenly cooking and flavoring the joint.
2. Pressure Cook the Gammon
Close the pressure lid and ensure the pressure release valve is set to ‘Seal.’ Select the Pressure Cook function, set the temperature to high, and the timer for 30-35 minutes per kilogram. For a 1.5 kg gammon, 45-50 minutes is a good guide. Press start and let the Foodi build pressure.
Once the cooking time is done, allow the pressure to release naturally for about 10-15 minutes. Then carefully turn the valve to release any remaining pressure before opening the lid.
3. Remove and Prepare for Glazing
Carefully lift the gammon joint out of the pot using tongs and set it on the Foodi’s crisping basket or rack. If you’re adding a glaze, now is the time to prepare and brush it onto the meat.
In a small bowl, mix honey, mustard, and vinegar or juice. Brush the glaze generously over the top and sides of the gammon. You can score the fat in a diamond pattern beforehand for an attractive presentation and better absorption of the glaze.
4. Air Crisp for a Golden Finish
Close the crisping lid. Select the Air Crisp function, set it to 200°C (392°F), and cook for 10-15 minutes or until the outside is golden brown and slightly caramelized. Keep an eye on the glaze to prevent burning, and baste again halfway through if desired.
5. Rest and Slice
Once the gammon is cooked and glazed, remove it from the basket and let it rest for 10 minutes. Resting helps the juices redistribute, ensuring tender and juicy slices. Then, carve the gammon into thick or thin slices, depending on your preference.
Serving Suggestions
Gammon is versatile and pairs well with many side dishes. Whether you’re going for a traditional roast dinner or a casual meal, there are plenty of options to accompany your Ninja Foodi gammon joint.
Popular Side Dishes:
- Roast or mashed potatoes
- Steamed green beans or broccoli
- Honey-glazed carrots
- Coleslaw or potato salad (for a cold platter)
- Eggs and toast for a breakfast-style serving
Leftover Ideas:
- Gammon and cheese sandwiches
- Chopped in omelets or scrambled eggs
- Added to pasta bakes or fried rice
- In soups or stews for added depth
Tips for Best Results
Here are a few additional tips to make sure your gammon joint in the Ninja Foodi is a success every time:
- Use the trivet or rackto elevate the meat slightly for better air crisping.
- Don’t overfillthe pot leave enough room for the pressure to build properly.
- Customize the glazeto your taste maple syrup, orange marmalade, or pineapple juice can also work well.
- Check internal temperatureif unsure the gammon should reach 71°C (160°F) internally.
Storing and Reheating
Leftover gammon stores very well in the refrigerator and even the freezer. Store in an airtight container in the fridge for up to 4 days. You can freeze it for up to 2 months. Slice and wrap portions individually for easy access.
To reheat, gently warm in a covered dish in the oven or use the microwave. If reheating larger chunks, a few minutes in the air fryer can help re-crisp the surface without drying out the meat.
Cooking an uncooked gammon joint in the Ninja Foodi is a simple, efficient, and flavorful method that transforms a traditional dish into a quick and hassle-free meal. The combination of pressure cooking and air crisping ensures your gammon remains moist and tender while developing that perfect golden glaze on the outside. Whether you’re serving it hot with sides or cold in sandwiches, gammon cooked in the Ninja Foodi is sure to become a family favorite. With minimal ingredients and straightforward steps, this method is ideal for both new and experienced home cooks looking to make the most of their multifunctional appliance.